Use the Display Settings dialog box to customize the appearance of a display.
To open this dialog box, click the Display Settings display icon ![]() , or right-click on the display and select Edit Display from the context menu.
, or right-click on the display and select Edit Display from the context menu.
Complete the following steps to customize the appearance of a display:
The settings that are shown vary per display type. The settings for a strip and block display are shown here.
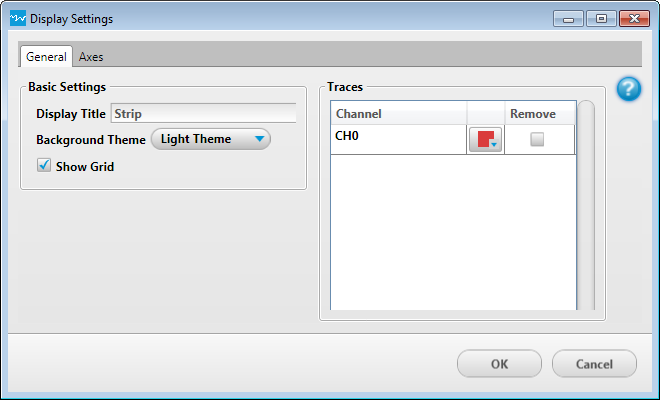
| Display Settings Dialog Box – General Tab | |
| Basic Settings | |
| Display Title | An optional title shown in the upper left corner of the display. |
| Background Theme | Sets the color theme for the display. Click the Theme arrow and select from these settings:
|
| Show Grid | Strip and block display only. Select this checkbox to show x-axis and y-axis grid lines on a Strip or Block display. This setting does not appear when configuring scalar display settings. |
| Value Font Size | Scalar display only. The font size used to display scalar data. This setting does not appear when configuring strip, block, and output display settings. |
| Traces | |
| Name | The name of the active channel. You can edit this name on the Channels dialog box. |
| Color swatch icon | Opens a color palette. The selected color is applied to the channel icon on all displays and the Active Channels list, the trace color on a Strip or Block display, and the data value on a Scalar display. |
| Remove | Select this checkbox to remove the channel from the display. |
Note: Settings on the Axes tab apply to strip and block displays only. To configure x-axis and y-axis settings for a strip or block display, refer to the Configuring Axes Settings topic.
Click OK to apply the settings to the display and to close the dialog box. Display settings are saved to the data file during an acquisition, and can also be saved in the configuration file.